How to photograph used auto parts for eBay Motors
A used part is a trust problem. The buyer cannot hold it, cannot test it, and has probably been burned before. Your photos are the buyer’s remote inspection - one input alongside the OEM number, the fitment data, the stated condition, the price, and your return terms - and the first thumbnail often decides whether they open the listing at all. This is the phone-only process a yard can run in a few minutes per part. It is one piece of how to sell auto parts on eBay profitably; here we go deep on just the photos.
eBay photo rules for used parts
Get these right before anything else, because breaking them can suppress your images or pull the listing:
- Show the actual item. For a used, damaged, or defective part, eBay requires a photo of the real unit, not a stock or catalog image and not a look-alike from another donor.
- No branding on the image. Added borders, logos, watermarks, artwork, and promotional text are all prohibited on item photos. Branding lives in your shop name and packaging, never rendered onto the picture.
- Size: at least 500 pixels on the longest side (about 1,600 px recommended so zoom works), up to 12 MB per file.
- Count: most categories allow up to 24 photos free; some show a lower cap, so trust the number your listing tool displays.
- The first photo is the hero: it appears in search results, so make it the cleanest, fullest shot of the part.
Build a simple phone photo station
No studio, no gear beyond the phone in your pocket:
- Soft, even light, not direct glare. Shoot in open shade, near a big doorway, or under diffused shop lights. The part should be bright enough to show surface texture, labels, and damage without blown highlights or deep shadows. Avoid direct flash, harsh sun, and mixed warm-and-cool lighting that throws colors off.
- A neutral backdrop. A roll of gray or white paper, a clean bench, or a single-color blanket. Clutter reads as “junkyard”; a plain background reads as “I know what I have.”
- A steady phone. A cheap stand or tripod keeps framing and crop consistent from part to part.
- A cloth and a ruler. Wipe dust off; a ruler in one wide shot gives scale on big parts.
Prep the part before you shoot
Shoot the identifiers first, then clean. Remove loose dirt and distracting residue, but photograph the labels, casting marks, and any condition evidence before you hit it with solvent or a pressure washer, because aggressive cleaning can wipe a paper label, erase a stamped number, or temporarily mask a leak or rust. Never apply tire shine, oil, or polish to make a used part look newer or hide corrosion - that crosses into misrepresentation.
The photo sequence
Run the same ordered set every time so nothing gets missed:
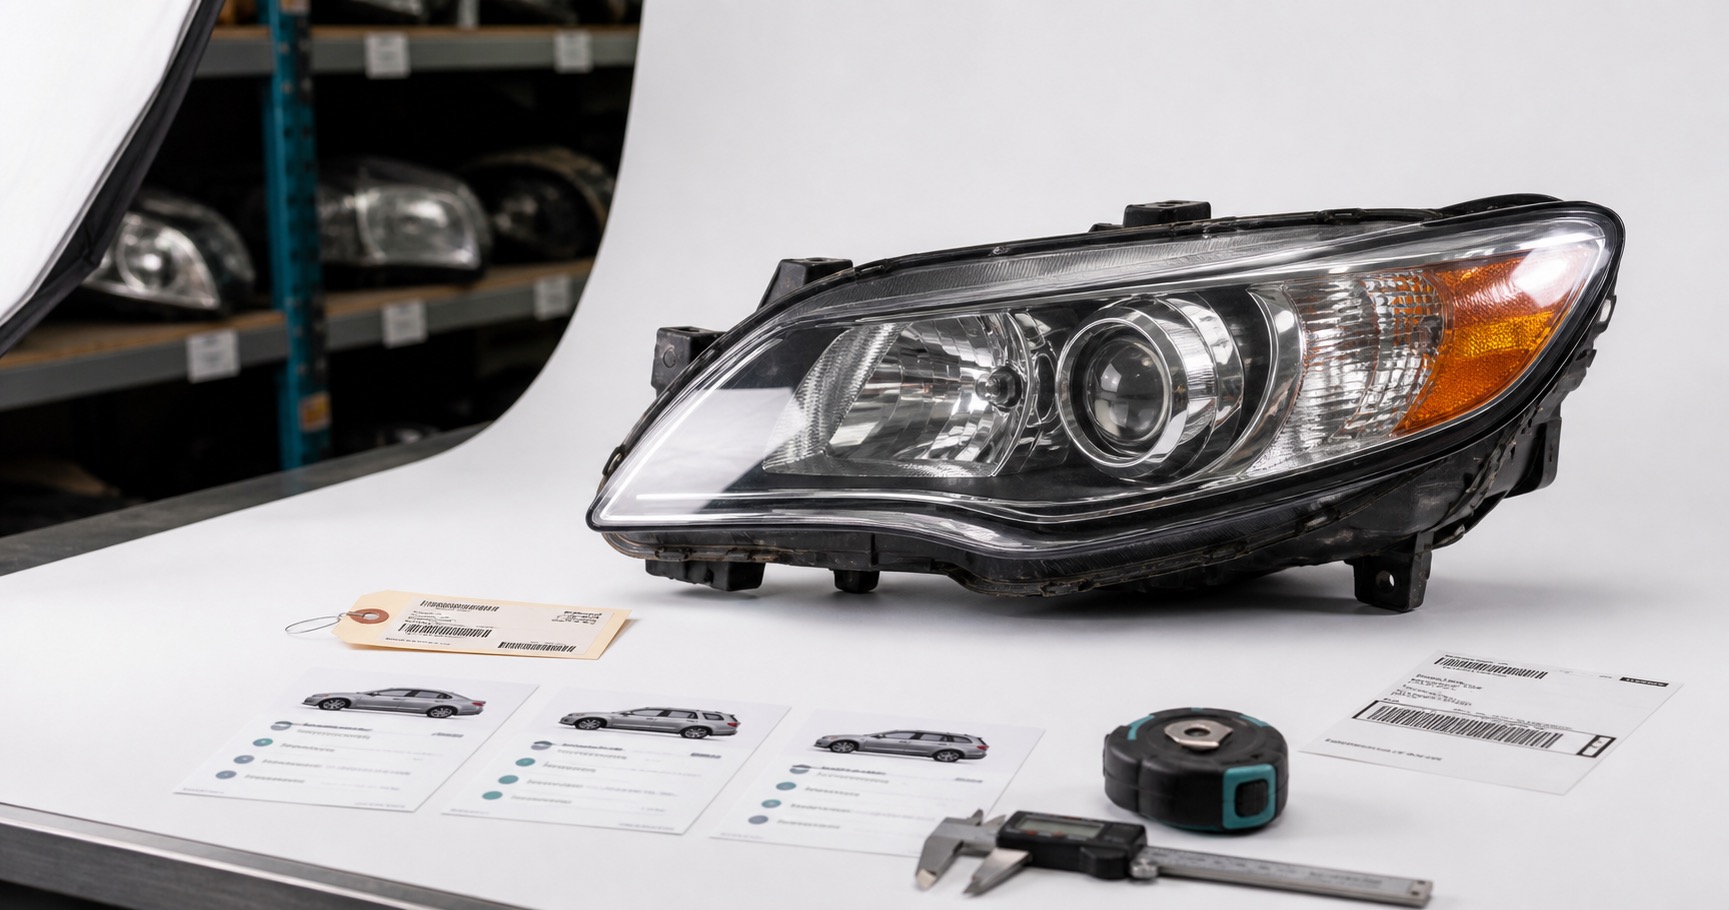
- Hero shot - the whole part, filling the frame, on the clean neutral background.
- Front, back, and each relevant side.
- Top or bottom where it matters.
- The OEM or manufacturer label, close and in focus.
- Any other casting, engineering, or serial numbers, shot separately.
- Every electrical connector, and the pins, without blur.
- Every mounting point, tab, and bracket.
- Included hardware or modules that come with it.
- A close-up of each defect - crack, chip, missing tab, corrosion, wear.
- Test or mileage evidence where you can honestly show it.
For high-value parts, add a photo of the packed item before it ships (more on that below).
Numbers, connectors, and mounting points
A clear shot of the part’s number lets the buyer confirm the physical item matches the listing. But two honest limits matter. First, a number visible only in a photo does not make your listing searchable - eBay does not read numbers baked into images. Put the verified number in the title and the Manufacturer Part Number and OE fields; the photo is for the buyer’s confirmation, not for search. And do not assume every number stamped in the metal is the orderable OEM number - a casting number is not the same as a service number, so shoot each identifier and enter only verified ones in the right fields (the difference is spelled out in OEM part-number cross-reference).
Second, connector and mounting-point photos help a buyer compare the plug shape and configuration, which builds confidence, but they do not prove the part will fit. Fitment comes from a verified OEM or interchange number plus eBay’s structured compatibility data, not from a photo of a plug.
Show every defect
Hiding damage buys you a return and a defect on your account; showing it builds trust and filters out the wrong buyer. Photograph cracks, missing tabs, curb rash, corrosion, prior repairs, and heavy wear, and describe them plainly in the listing. Honest defect photos are also your record if a buyer later claims the part was not as described, though they do not by themselves guarantee the outcome of a return or dispute - that is why accurate listings plus a returns process matter together. One compliance note: standalone airbags and inflators can no longer be listed on eBay as of September 24, 2026, so do not shoot them for eBay (details here).
Shot lists by part type
Different parts carry different buyer risk. Add these to the universal sequence:
- Electronic modules (ECU, BCM, ADAS): front and back, the full label with the software or calibration number, the connector configuration and pins, any broken case tabs or corrosion. Disclose in the listing if the part needs programming or coding to the buyer’s VIN - a matching number is not always plug-and-play.
- Headlights and taillights: lens straight on, the back housing, every mounting tab, connectors, whether the ballast or module is included, and any condensation, cracks, or haze. Note the side (left or right).
- Wheels: full face and back, the size and offset stamp, bolt pattern, center bore, and any curb rash, bends, or corrosion. Shoot each wheel individually if selling a set.
- Body panels: the complete panel front and back, edges and attachment points, rust and dents under raking side light, prior repair, and the paint or trim code when known.
- Engines and transmissions: the complete assembly, identifying stamps, what accessories are included, broken mounts, and pallet or packaging before a freight shipment. A photo does not prove a drivetrain runs, so do not label a part “tested” on the strength of an image.
Edit without misrepresenting the item
Edit the presentation, never the condition. Cropping, straightening, exposure and white-balance correction, a clean neutral background, and mild sharpening are all fine. Removing scratches, filling dents, whitening, recoloring, faking reflections, AI reconstruction, beauty filters, and masking rust are not, because the image has to accurately represent the part. A note on background removal: eBay has its own built-in background and AI-background tools, and any automated cutout can clip a thin wire, a mounting tab, a connector pin, or a clear lens edge, or smooth over a crack - so treat a processed image as a draft, keep the untouched original, and reject the cutout if it ate an edge or a defect. Keep color honest by shooting under one type of light; for painted and interior parts, give the factory color or trim code rather than treating a photo as an exact color match.
Save your photos as an inventory record
The photos are the easy part; keeping them attached to the right part is where used-parts operations break down. Every image should stay linked to the donor, the SKU, the part record, and the shelf location, so the picture in the live listing is always the exact unit your team pulls and ships - not a look-alike from another donor. Before a high-value part leaves, take a quick pre-shipment set (the part and its packaging) as a condition record. This is where a system beats a camera roll: see how to inventory a salvage yard.
How reParta helps
Background removal is table stakes, not an edge - eBay already offers it, and a branded backdrop would break eBay’s picture policy anyway. What actually saves a yard time is traceability. In reParta, every image you capture stays linked to that part’s donor VIN, SKU, part record, OEM number, and warehouse location, so the photo in the live eBay listing is always the exact unit your team pulls from the shelf and ships - no re-shoots, no “which alternator was this?”, no wrong core because two photos got swapped. reParta lists to your own eBay account through the native API with automatic delist when a part sells, assists Facebook through the reParta browser extension, and rolls the realized numbers into per-donor P&L. We are also building mobile capture tools to make this SOP faster on the yard floor - to help shoot the full sequence, flag a label that is not readable before it is listed, and prepare a compliant clean-neutral hero shot, with every AI-assisted edit shown for your review before it publishes and never a logo, watermark, or altered condition. It all lives in one auto parts inventory management software.
Good photos do not change the part, but they can raise buyer confidence, document condition, and cut avoidable misunderstandings. Start a free 14-day trial - no card required - or see plans and pricing.
Frequently asked questions
What are eBay's photo requirements for used parts?
You need at least one photo, a minimum of 500 pixels on the longest side (about 1,600 px is recommended so buyers can zoom), and most categories allow up to 24 photos for free - check the count your listing tool shows for your category. For a used, damaged, or defective part you must show the actual item, not a stock or catalog photo, and you may not add borders, logos, watermarks, or promotional text to the image. The first photo is your hero: it appears in search, so make it the cleanest full shot of the part.
Can I put my logo or a branded background on eBay photos?
No. eBay's picture policy prohibits added text, logos, artwork, marketing material, watermarks, and borders on item photos, and it can keep your images out of search or get the listing pulled. Keep branding in your shop name, the listing text, and your packaging, never rendered onto the image. A clean neutral background is fine and encouraged; a branded one is not.
Does a photo of the part number help my listing get found?
It helps the buyer confirm the physical part matches the listing, but it does not make the listing searchable on its own - eBay does not read a number baked into an image, and added text on photos is against policy anyway. To be found, type the verified OEM or manufacturer number into the title and the Manufacturer Part Number and OE fields. Photograph the number so the buyer can verify it; enter it in the structured fields so search can use it.
Do connector and mounting-point photos prove a part will fit?
No. They let a buyer visually compare the plug shape and mounting configuration, which builds confidence, but they do not prove fitment. Fitment comes from a verified OEM or interchange number plus eBay's structured compatibility data (year, make, model, engine). Use the photos to help the buyer recognize the part, and the compatibility table to actually establish fit.
Can I edit eBay photos of used parts?
Edit the presentation, never the condition. Crop, straighten, correct exposure and white balance, replace a busy background with a clean neutral one, and sharpen mildly - all fine. Removing scratches, filling dents, whitening, recoloring, faking reflections, AI reconstruction, beauty filters, or masking rust are not, because the image has to accurately represent the item or you risk a not-as-described case and a policy strike. Keep the original unedited files.